Friday, December 31, 2010

It's A Banner Day At My House Today!

A banner day indeed!!!

As I pack up my Christmas decorations, I thought I'd take a break and share this banner I've created :)


I was inspired to create this pretty banner by Terri from joyfulcompass on Youtube. She has an AMAZING video on a banner she created! You can check it out HERE...


I used vintage music sheets to form the rosettes and also added some torn pieces to the banner as well.


I just LOVE the beautiful detail on this IOD paper, Night Divine!!!


Nothing says Christmas more than the beautiful carol, O Holy Night. This paper was the perfect choice for my first holiday banner :)


I've used some Lindy's Stamp Gang products to color my white seam binding and add TONS of shimmer to this project. I've colored my scalloped circles and even my spools with their sprays!!!


To see this project in "live action", check out my Youtube video HERE...

Thanks so much for stopping by today :) Stay safe and I'll see ya next year!!!

Monday, December 27, 2010

The Case Of The Great Cover-Up...

...or was it "A Great Cover-Up For My Case"?!?!

Let me start at the beginning :) I've been LoViN' my sewing machine lately---I mean, LUH-VIN!!! I think I've stitched every single project I've done for months now. So, I thought I'd share a few of my fave's.

Here's a little peek into the disorganization of my beautiful, "new-to-me" cabinet that my mom refinished for me...


...I promise, there is a point to this little segue :)

It has beaufiful, dark wood but not too much coverage for my mess. I still haven't decided what kind of doors I plan to add, if any. So, in the meantime, I decided it needed a pretty little slipcover...with RuFFleS!!!


I can't get enough of this unbleached, cotton fabric! And this was my first cutom sewing project. I'm so proud!!! ***Please excuse the wrinkles-they're much less noticable in person, lol!***

And here's a cutie I stitched up for my little princess. This plush little friend is actually a back-pack purse :)


What's better than a fluffy friend???


One that holds all your treasures for you!!!


The pattern for this "Buddy Pack" can be found at "Winterpeach" on Etsy.

Thanks so much for droppin' by!!!

xoxo

Monday, December 20, 2010

Christmas Wreath

Hi, Everyone! I've been creating my fingers to the bone the last couple weeks...

Even though I'm tired (late night and last minute crafty-ness) and my fingers are sore (hot glue gun...ouch!), I have to say that I feel very productive and am now surrounded by such pretty decorations :)

I have many more projects I'd love to finish, but what good is creating all this pretty-ness, without documenting it (am I the only one who likes to look back at my projects from days gone by?) and sharing with my CraFtY FriEnDs???

So, a quick break to share what's been goin' on in my studio...and my kitchen...and my living room...it kinda migrated, lol!

My "Baby" girl and I worked together to create this BEAUTIFUL Christmas Wreath. The base is a couple wreath's I picked up from my local dollar store. I've cut strips of white burlap, unbleached cotton (stamped with music), some netting (tea dyed) and a bit of torn, light blue tulle...


A massive bow...Although I think it could've been even BIGGER ;) ...


And vintage rhinestones to add some **sparkle**.


Thanks so much for dropping by. I've got several more projects I want to share, so see ya soon!!!

xoxo

Saturday, December 4, 2010

**SwEEt!**

Hello, hello!!! Are y'all ready for some yummy goodness??? This recipe is perfect for a cozy breakfast on a cold morning :)

Blueberry Scones With Lemon Glaze

Blueberry Scones:
2 cups all-purpose flour
1 tablespoon baking powder
1/2 teaspoon salt
2 tablespoons sugar
5 tablespoons unsalted butter, cold, cut in chunks
1 cup heavy cream, plus more for brushing the scones
1 cup fresh blueberries

Lemon Glaze:
1/2 cup freshly squeezed lemon juice
2 cups confectioners' sugar, sifted
1 lemon zest, finely grated
1 tablespoon unsalted butter

Directions
Preheat the oven to 400 degrees F.
Sift together the flour, baking powder, salt, and sugar. Using 2 forks,
cut in the butter to coat the pieces with the flour. The mixture should
look like coarse crumbs. Make a well in the center and pour in the heavy
cream. Fold everything together just to incorporate; do not overwork the
dough. Fold the blueberries into the batter. Take care not to mash the
blueberries because their strong color will bleed into the dough.
Press the dough out on a lightly floured surface into a rectangle about
12 by 3 by 1 1/4 inches. Cut the rectangle in 1/2 then cut the pieces in
1/2 again, giving you 4 (3-inch) squares. Cut the squares in 1/2 on a
Diagonal to give you the classic triangle shape. Place the scones on an
ungreased cookie sheet and brush the tops with a little heavy cream.
Bake for 15 to 20 minutes until beautiful and brown. Let the scones cool
a bit before you apply the glaze.
Mix the lemon juice and confectioners' sugar together in a microwave
safe bowl. Stir until the sugar dissolves. Add the lemon zest and butter.
Microwave it for 30 seconds on high. Whisk the glaze to smooth out any
lumps, then drizzle the glaze over the top of the scones. Let it set a minute
before serving.

My Hubby just LOVES blueberry!!! Pancakes, muffins, pie, waffles...I mean EVERYTHING blueberry!

I LOVE lemon!!! I think this is a great compromise :) I just don't tell him there's lemon in it, lol...

Now onto the project.

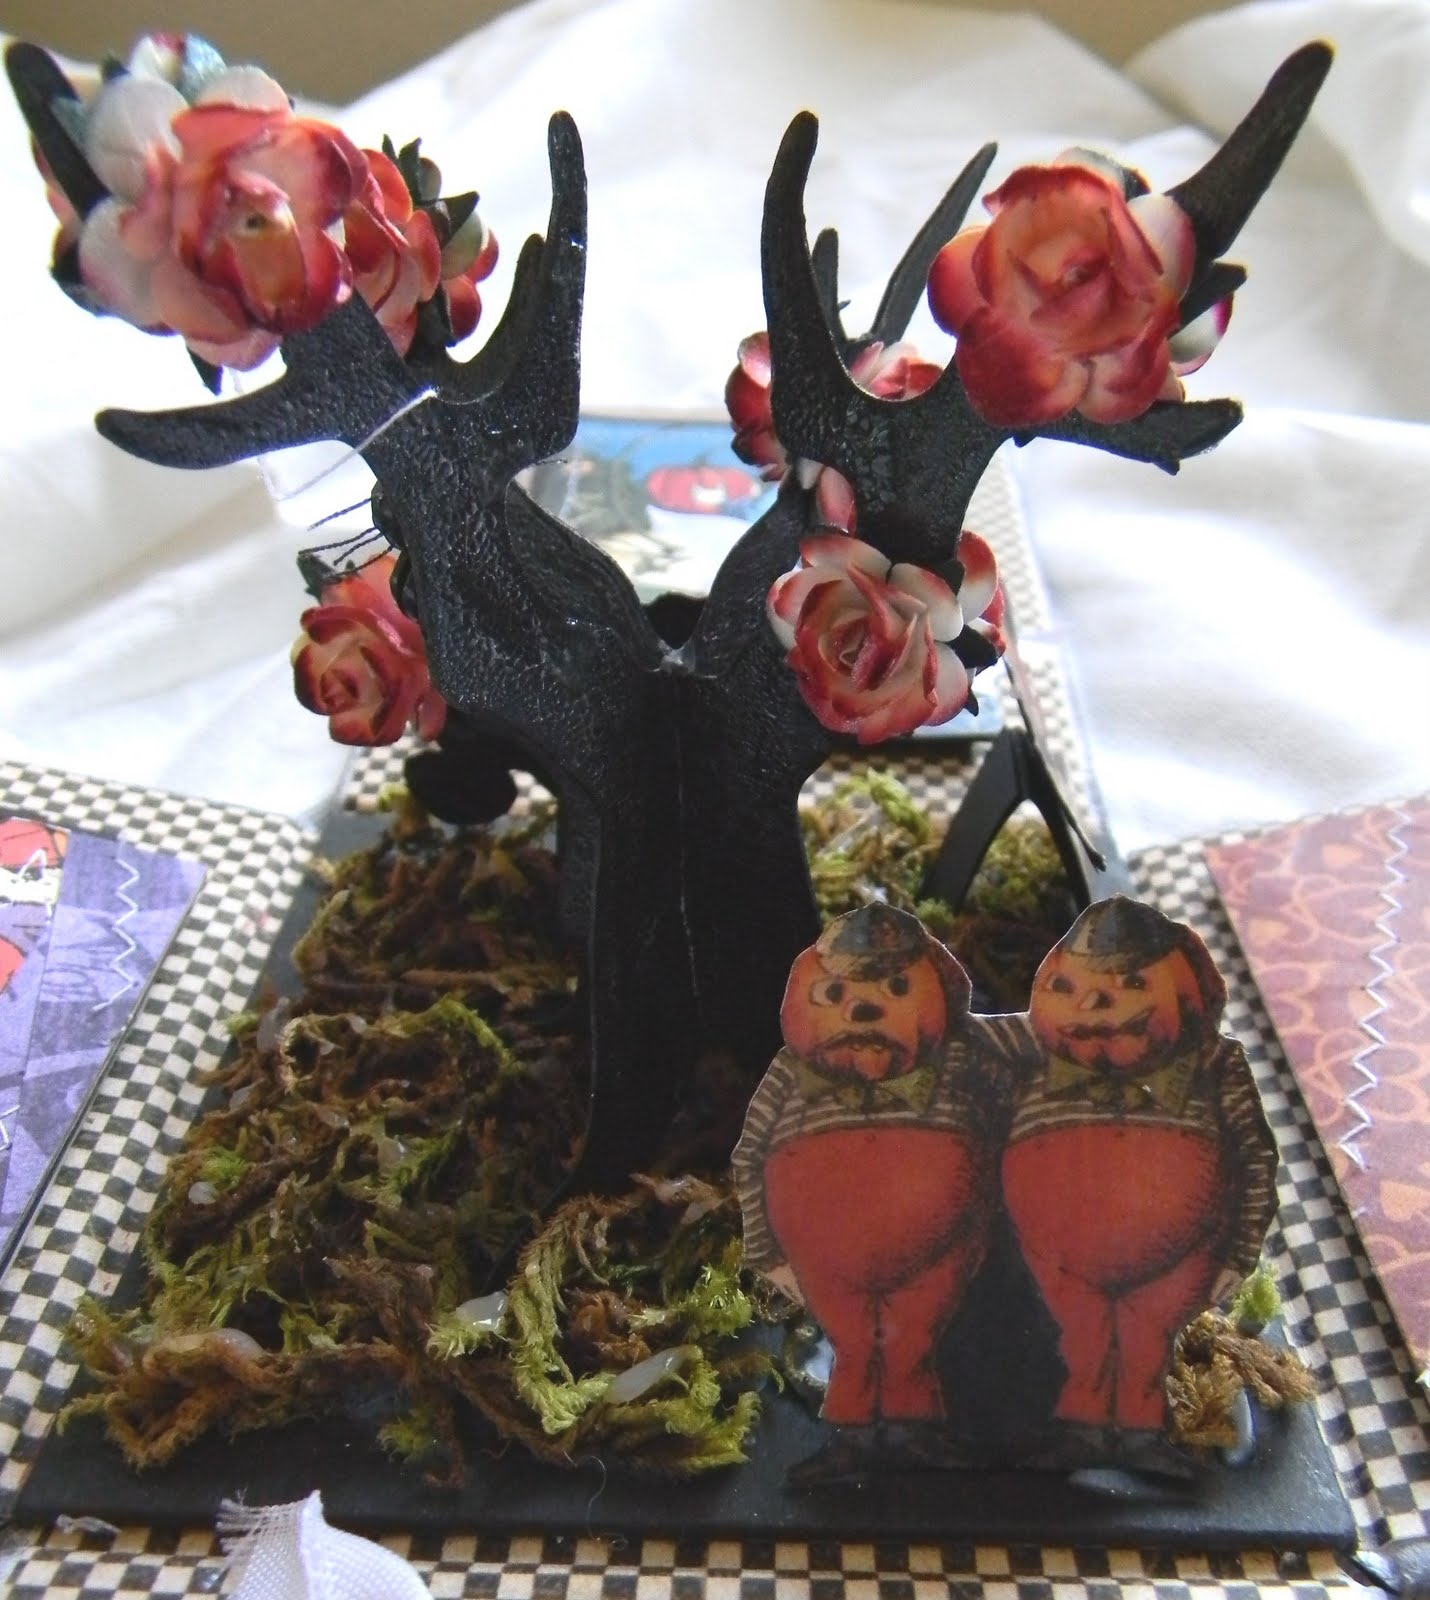
This page was created for swap with my Marie Antoinette Mail Art group. When I saw this swap, I just couldn't let it pass me by! What could be better -- a beautiful book AND food, lol!

Seriously, though. I can't wait to get bakin' with my babies :)


Here's a close-up of the page. SpArKLeS!!! The first photos didn't pick up the lovely shimmer I've added to this "SwEEt-ly PiNK" page!


That's it for today...Now, go bake some scones, people!!!

Until next time...

Monday, November 22, 2010

My Time With Tim (aka Mr. Holtz!!!)

Hi, Everyone!!!

I've just returned from a most excellent adventure (San Dimas Shout Out!)! I feel relaxed, and more importantly, creatively rejuvinated. Inspired.

This weekend I was able to take a class taught by Tim Holtz in BEAUTIFUL Payson, Arizona! It was the last chance to take his Artful Curio class and his last teaching engagement for the year.


I went in with NO expectations-NO ideas of what I was going to come home with. I didn't even look at the picture of Tim's finished piece that graced the front of the kit!

This way, I was sure to create something that truly MEANT something to ME!!! A sort of scrapbook of found items.


It took no time at all to lose myself in all the pretty trinkets and baubles. I had the best time adding things to my curio!

So many times we find ourselves bogged down in what we SHOULD do. Gifts to create, scrapbooks to fill, deadlines to make. Sometimes it's necessary to just make something that makes us happy! Something that's created just to fill our need to create.

This one's for me...

Until next time!!!

Friday, November 5, 2010

Halloween In Wonderland...

Explosion Box!!! Yep, I said it---Halloween. I DO realize Halloween is currently almost a year away...

So, I'm a little slow ;)

I've always loved Halloween projects! I'm envious of people who make AND FILL Halloween mini alubms full of pictures EVERY year!! I've only taken a choice few pictures of my little darlings on Halloween over their entire LIFETIME!

I guess I'm just a candy monster...Can't wait for the photo opp! Gotta get to the candy gettin'!

Here's a little picture of my "Batgirl" impatiently posing for Mommy's pictures. "CAN WE TRICK-OR-TREAT NOW???" I guess I know where she gets it from!!!


So this project fills my SpOoKy AlBuM void. A little display of all my favorite "little monster" pictures from over the years...


The main structure of the box was created from chipboard. I've found the average "paper" construction gets demolished after a year spent packed away (or at least the way my Hubby throws stuff around, lol!).

The top has a spooky black-on-black crackle finish. I love the texture it adds to an otherwise simple lid!


I've created a mini shadow box in the underside of the lid. I think this Alice quote is perfect for a Halloween project---when nothing is EVER as it seems...


DRUMROLL...TA, DA!!! I know...spooky, right?!?!?


The inside sports a mini scene---it's my take on "painting the roses red"! I've put some of my favorite characters in The Queen's Spooky Garden. I just love how these red and white flowers add a pop of color against the black tree.


This BLING-TASTIC spider dangles from my rosebush adding another level of EEK! to this SPOOK-TACULAR box!!!


On the sides, I've added some tags and folding elements to give plenty of opportunity for pictures and journaling. I've done some "messy" stitching to create the rustic look I was going for.


For a live "play-by-play" check out my Youtube vid HERE!!!
Thanks for stopping by! I'll be back with some "Holiday Goodness" SOMETIME before Valentine's Day, LOL!!!

Until next time!!!


Saturday, October 30, 2010

A Kid, A Pumpkin And A Knife...What Could Go Wrong???

Thankfully, nothing did!!! My kiddos carved (or sketched out a face to be carved, in Paige's case!) and carved and CARVED until they were just right...


Ant's Fang-tastic...


Josh's Goulish...


And Paige's Spook-tacular Jack-o-lantern!!!


Our porch is sure to be the spookiest on the block!!! Until next time...

Thursday, October 28, 2010

Creepy Cones

Hi, All! Ready for another SpOoKY PrOjEct??? How 'bout some Creepy Cones!!! Cones aren't just for ice cream ya know :)

Here are my creepy cones all "done up" for Halloween...


And FILLED!!! I think my "babies" (I use the term VERY loosely, lol!) will just LOVE these!


I love these cones so much, I'm thinking maybe I should make some for Thanksgiving...and Christmas Cones would be lovely...and maybe Valentine's...LOL!

Until next time!!!